JDD Photography
I'm just your average Millennial, obsessed with staying home, binge-watching Parks & Rec and drinking all the Diet Coke in the house. I am a lover of Israel Diaz, female led businesses and long flowy dresses.
Welcome to my home on the internet where we talk life, theology, womanhood, marriage and work.
Search It
Archives
- October 2025 (1)
- June 2024 (1)
- May 2024 (1)
- April 2024 (1)
- December 2023 (5)
- November 2023 (2)
- October 2023 (3)
- September 2023 (5)
- August 2023 (3)
- July 2023 (3)
- May 2023 (2)
- April 2023 (1)
- August 2022 (3)
- December 2021 (3)
- October 2021 (3)
- September 2021 (4)
- August 2021 (2)
- February 2021 (1)
- January 2021 (9)
- June 2020 (1)
Categories
How To Take Better Smartphone Pics Of Your Kids Part IV: Editing
October 6, 2023
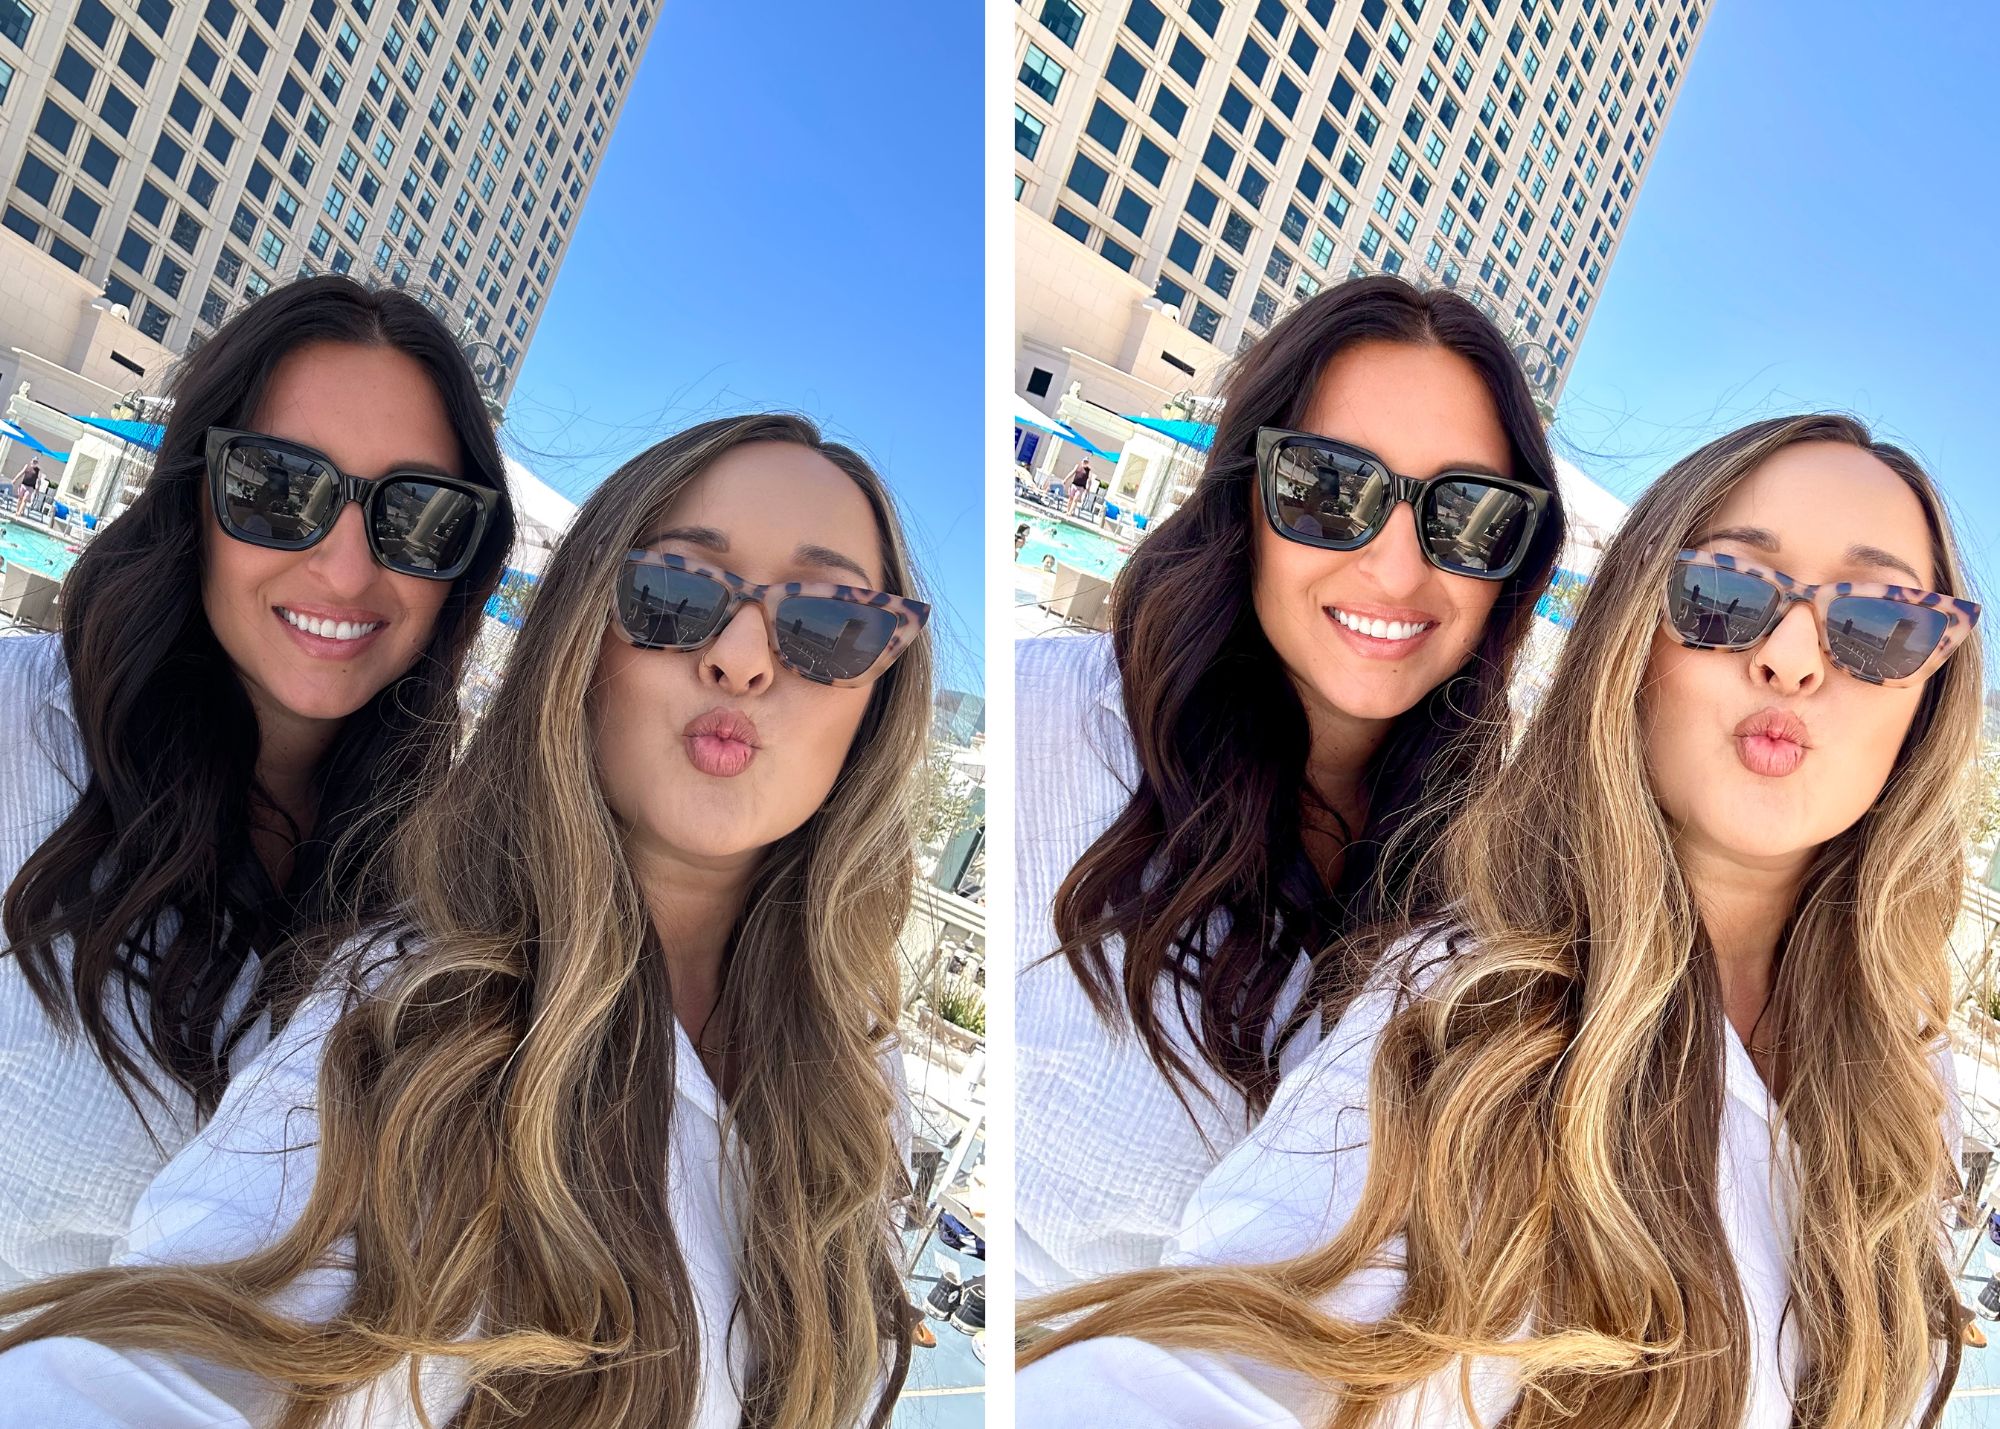
I am of the mind that a photo isn’t finished until it’s been edited.
Now, I’m not talking about slapping filters onto your image to give it a really interesting look, only to come back to the image a year or two later and realize that it looks a little cartoonish. I’m talking about editing an image so that it looks closer to the real life moment. Our cameras – yes, even our smartphone cameras – have sensors that the human eye doesn’t. They can pick up so much more information than we can, thus our photos end up looking slightly different than the memories we have of those moments. Editing is the tool I use to get my photos to look like my memory of the moment.
We’ve come to our final installment of this series, friends. Let’s talk about editing….
I approach editing the way I approach makeup: with a gentle hand. Generally speaking, we want our makeup to enhance our natural features, we don’t want to look like a totally different person. The same principle applies to editing my photos. I never want to make an image look like an unnatural, computer-generated file. Oftentimes, filters and presets* can be distracting – they steal the attention of the viewer, when you really want that attention on your subject, not your editing style. Just like makeup, the edit should enhance the subject, it shouldn’t be the main attraction.
*A preset is what you would call a “filter” in photo-editing apps like Lightroom or VSCO. The edit is essentially “pre-set” and can be placed on any image you import.
Here are my best tips when it comes to editing your smartphone photos.
1. Good Editing Starts With Good Lighting
We get to use a gentle hand in editing when we abide by our lighting principles. When we take photos in poor lighting, we are required to use a heavy hand when it comes to editing because otherwise, our subject can suffer. When we use our lighting principles we have an excellent foundation to begin with. Sticking with the makeup metaphor, if we go to bed with a face full of makeup on and in the morning only have time to “fix” it, we’ll wind up looking like a hot, cakey mess. But, if we wash our face at night and in the morning, only have time for a few touch ups, we’ll look a lot more refreshed, and our skin will look a lot more like skin, than if we have to double down on our concealer to get rid of the mascara under our eyes. In both cases, less is more, so let’s set ourselves up for success by starting with a good base.
2. Try to Edit Every Photo The Same Way
Do you ever wonder how some people’s images just look so cohesive? Like they’re one tile in a larger pile, all telling the same story, and being laid in the same mosaic? Like they all just go together? That’s consistent editing. Many people use presets and filters to achieve the cohesive look, and I think that’s great – though, again, can sometimes steal the show. But if you don’t have access to a preset or a filter, it can be tricky to try to achieve the same look every time, especially if you take photos in various lighting scenarios. I don’t use a preset, and I don’t use filters, but the reason I can keep my photos look like tiles in the same mosaic is because my north star for editing is keeping things as true to life as possible. That is my goal and I use certain editing techniques to achieve the same look every time.
3. Choose The Best Editing Tools For You
There are so many different apps you can use to edit your smart phone images. To name a few, there’s Lightroom, VSCO, and Snapseed. I have used all of these apps and I love them, but what’s great about trying to make your photos look true-to-life, is that you likely don’t even have to use a separate app to achieve that look. Most of the time, you can edit them right in your photo library. I will speak for iPhones since that is the phone I use, but android phones likely also have some built-in photo editing software that you can use free of charge.
How To Edit Your Photos:
Now that we’ve covered the basics, I’m going to walk you through an edit using only my iPhone’s photo library tools. Full disclosure: I actually use Lightroom to edit all my photos (iPhone and DSLR) because it has a higher capacity for editing and I like to be able to edit the colors in my photos. However, you don’t NEED an extra app to be able to create images you love and will want to frame. So, here is how I would edit my photos using only what my smart phone offers:

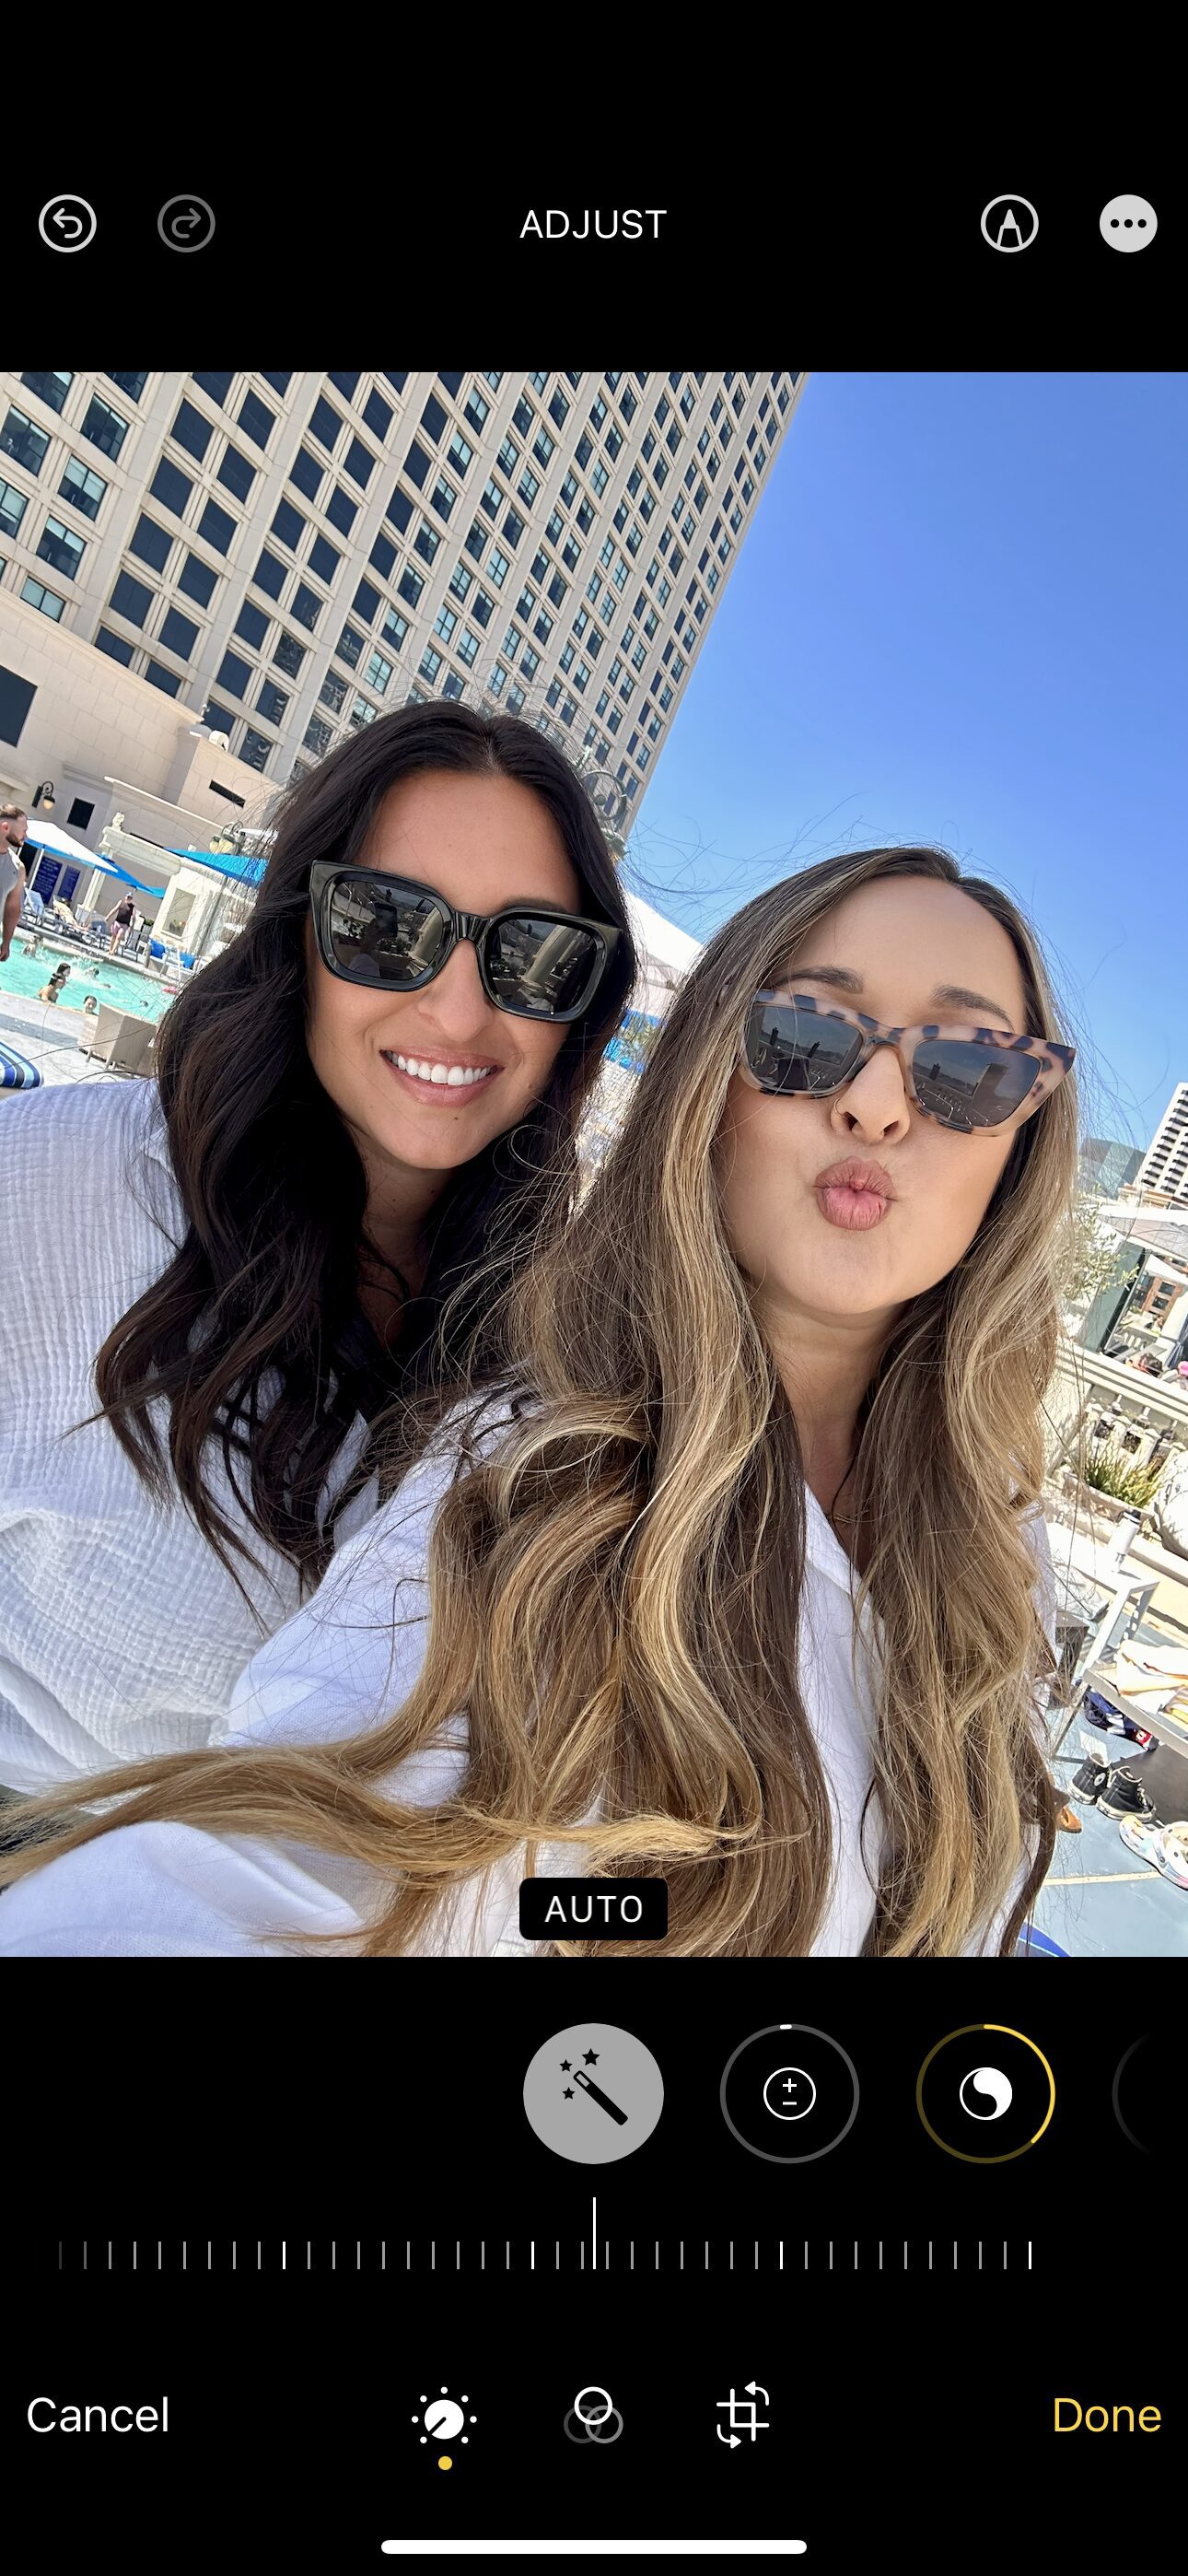
Click Edit
I begin by selecting the photo I want to edit and in the top right corner, clicking on the “Edit” button.
Auto
I am not usually an “auto” type of gal, but our smartphones are, well, smart. By starting with auto, your device will already be trying to give you the best true-to-life edit it can come up with which often serves as a great starting point for an edit. So, click that “auto” button and see what comes up.
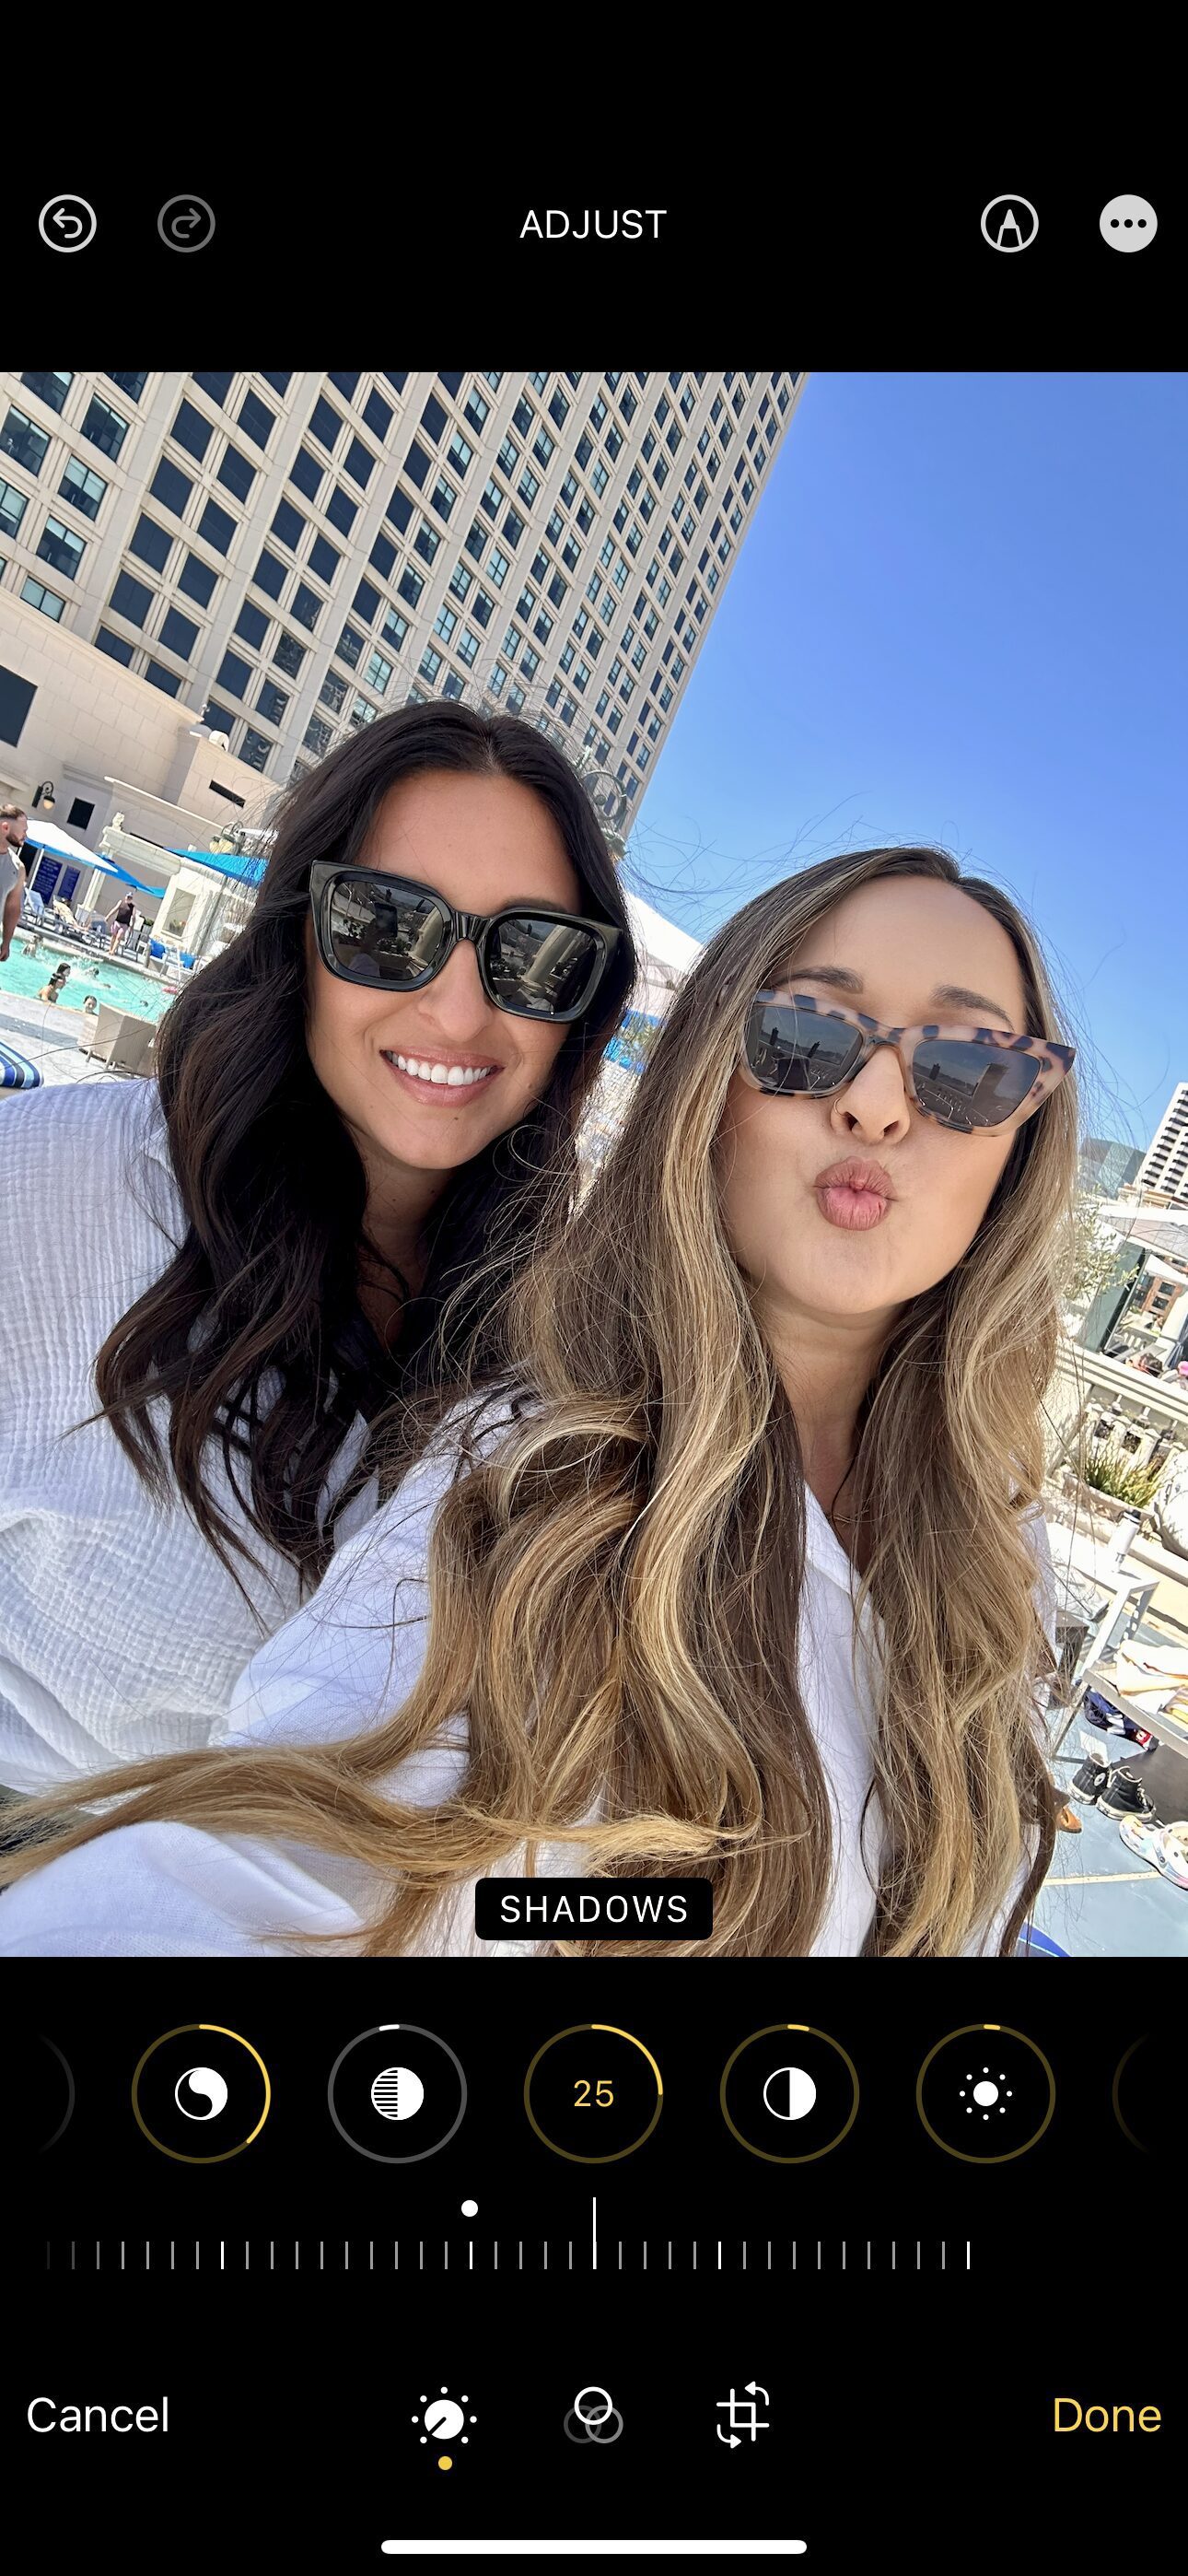
Shadows
Once I clicked “auto”, I would then adjust my shadows. This number will vary depending on light, but I usually gauge how far to go by looking at my subject’s hair. If you can see every detail, you’ve gone too far. A little more detail and brighter skin is what I’m looking for.
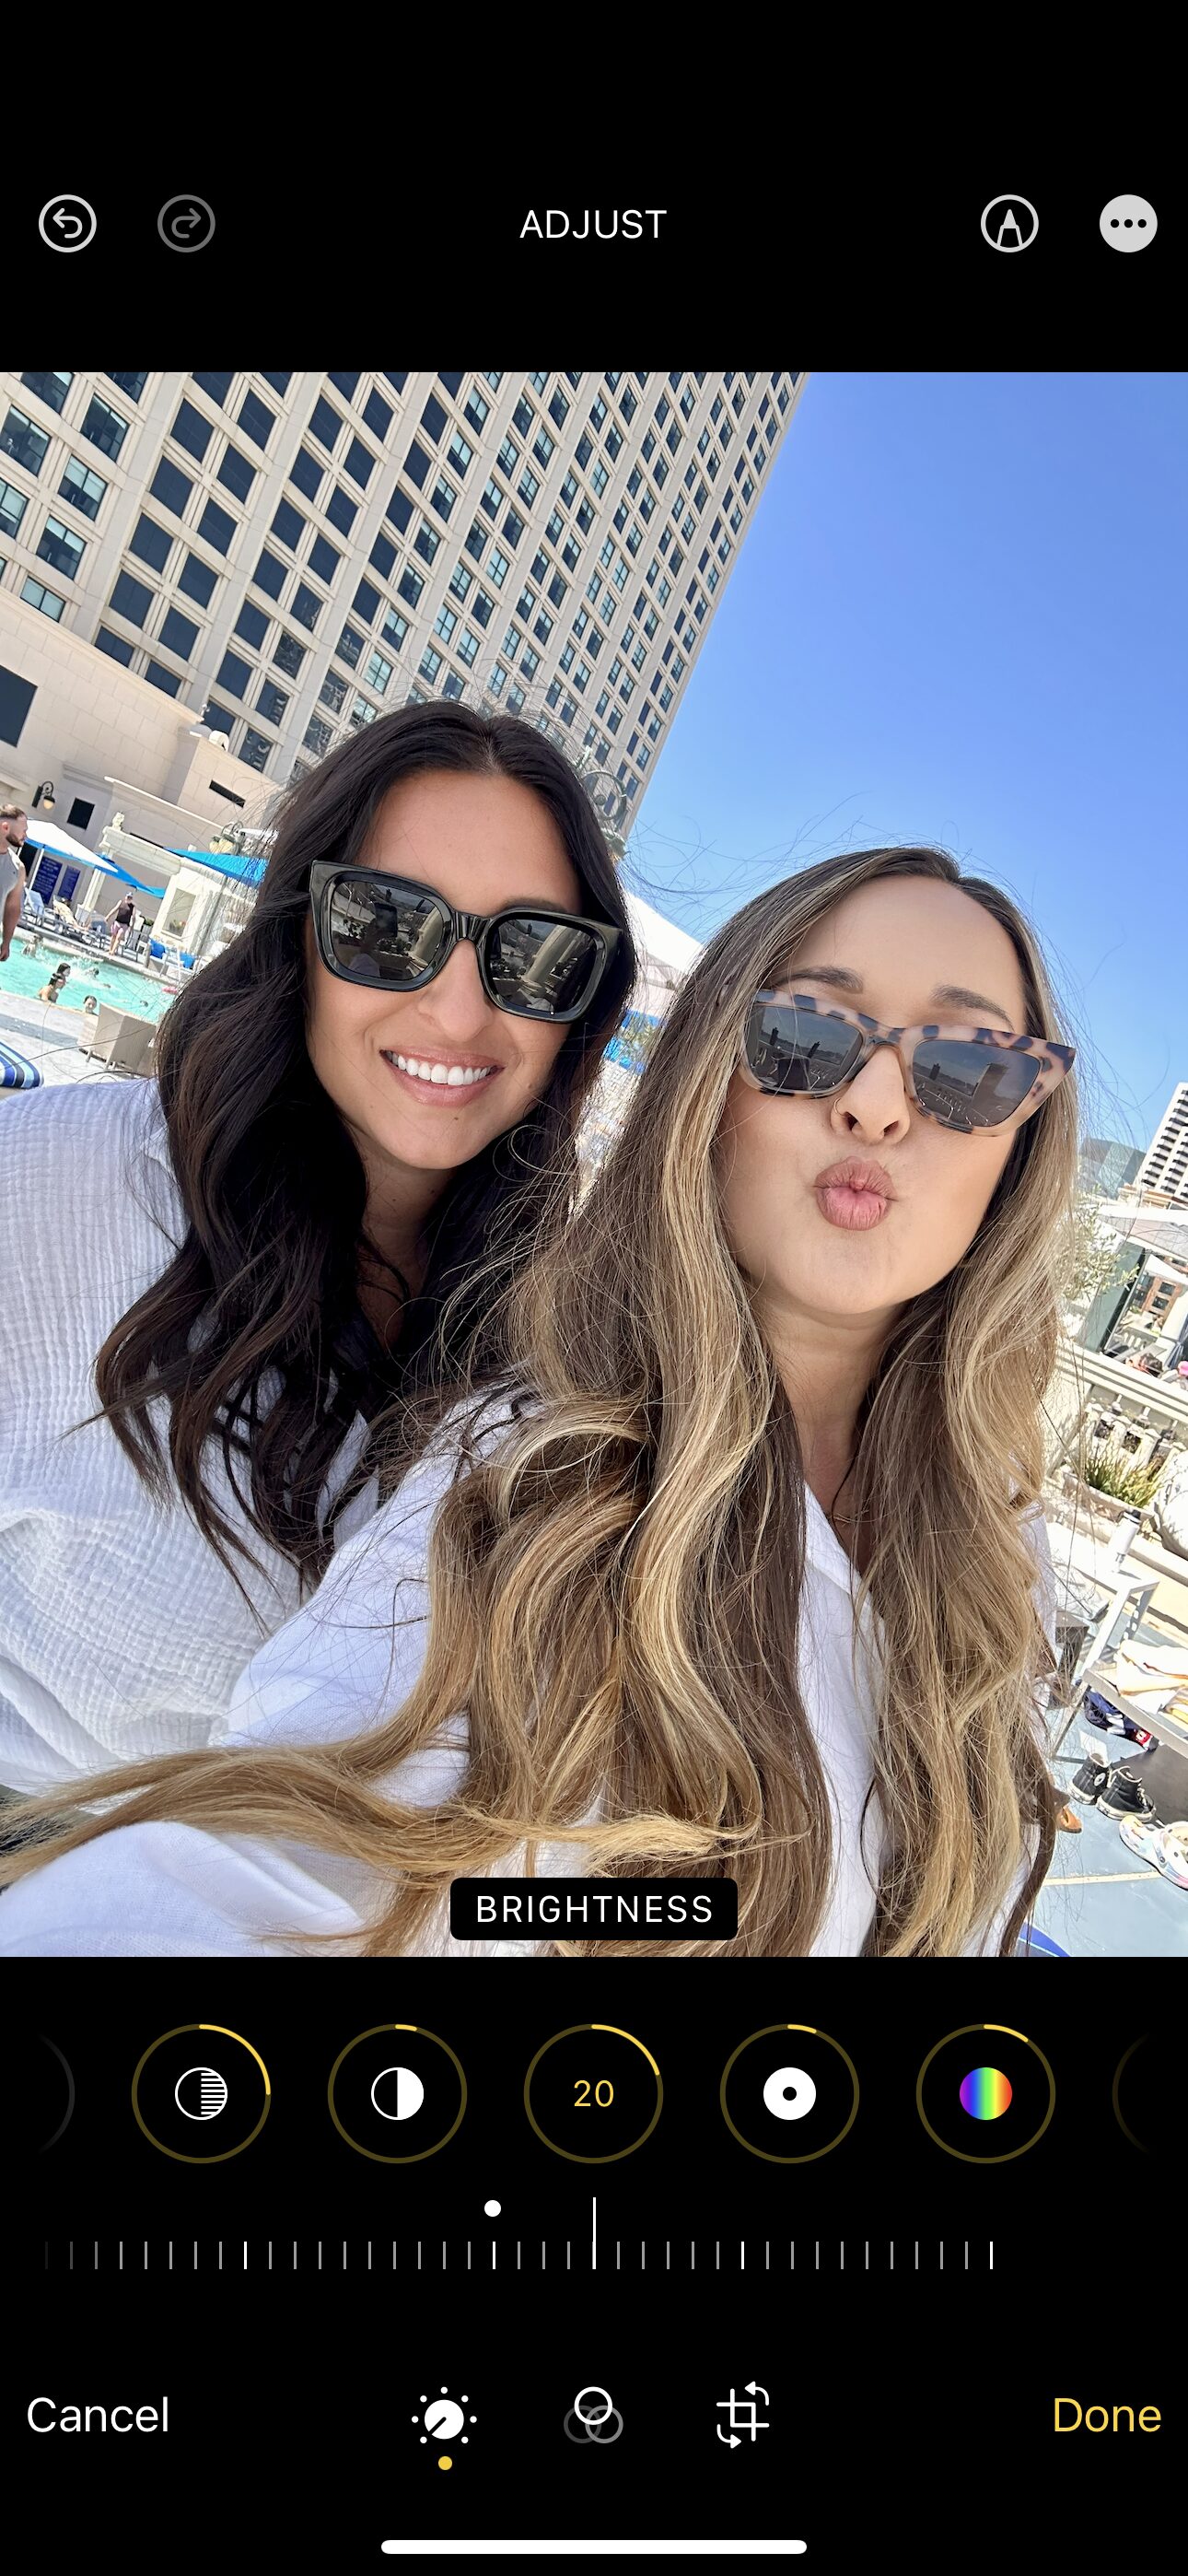
Brightness
I like my photos bright, and if you’re capturing an image in open shade, your subject may look pretty dark to begin with. My phone isn’t going to bring my image up to my particular brightness preference so after I bring up the shadows, I’ll bring up the brightness as well.
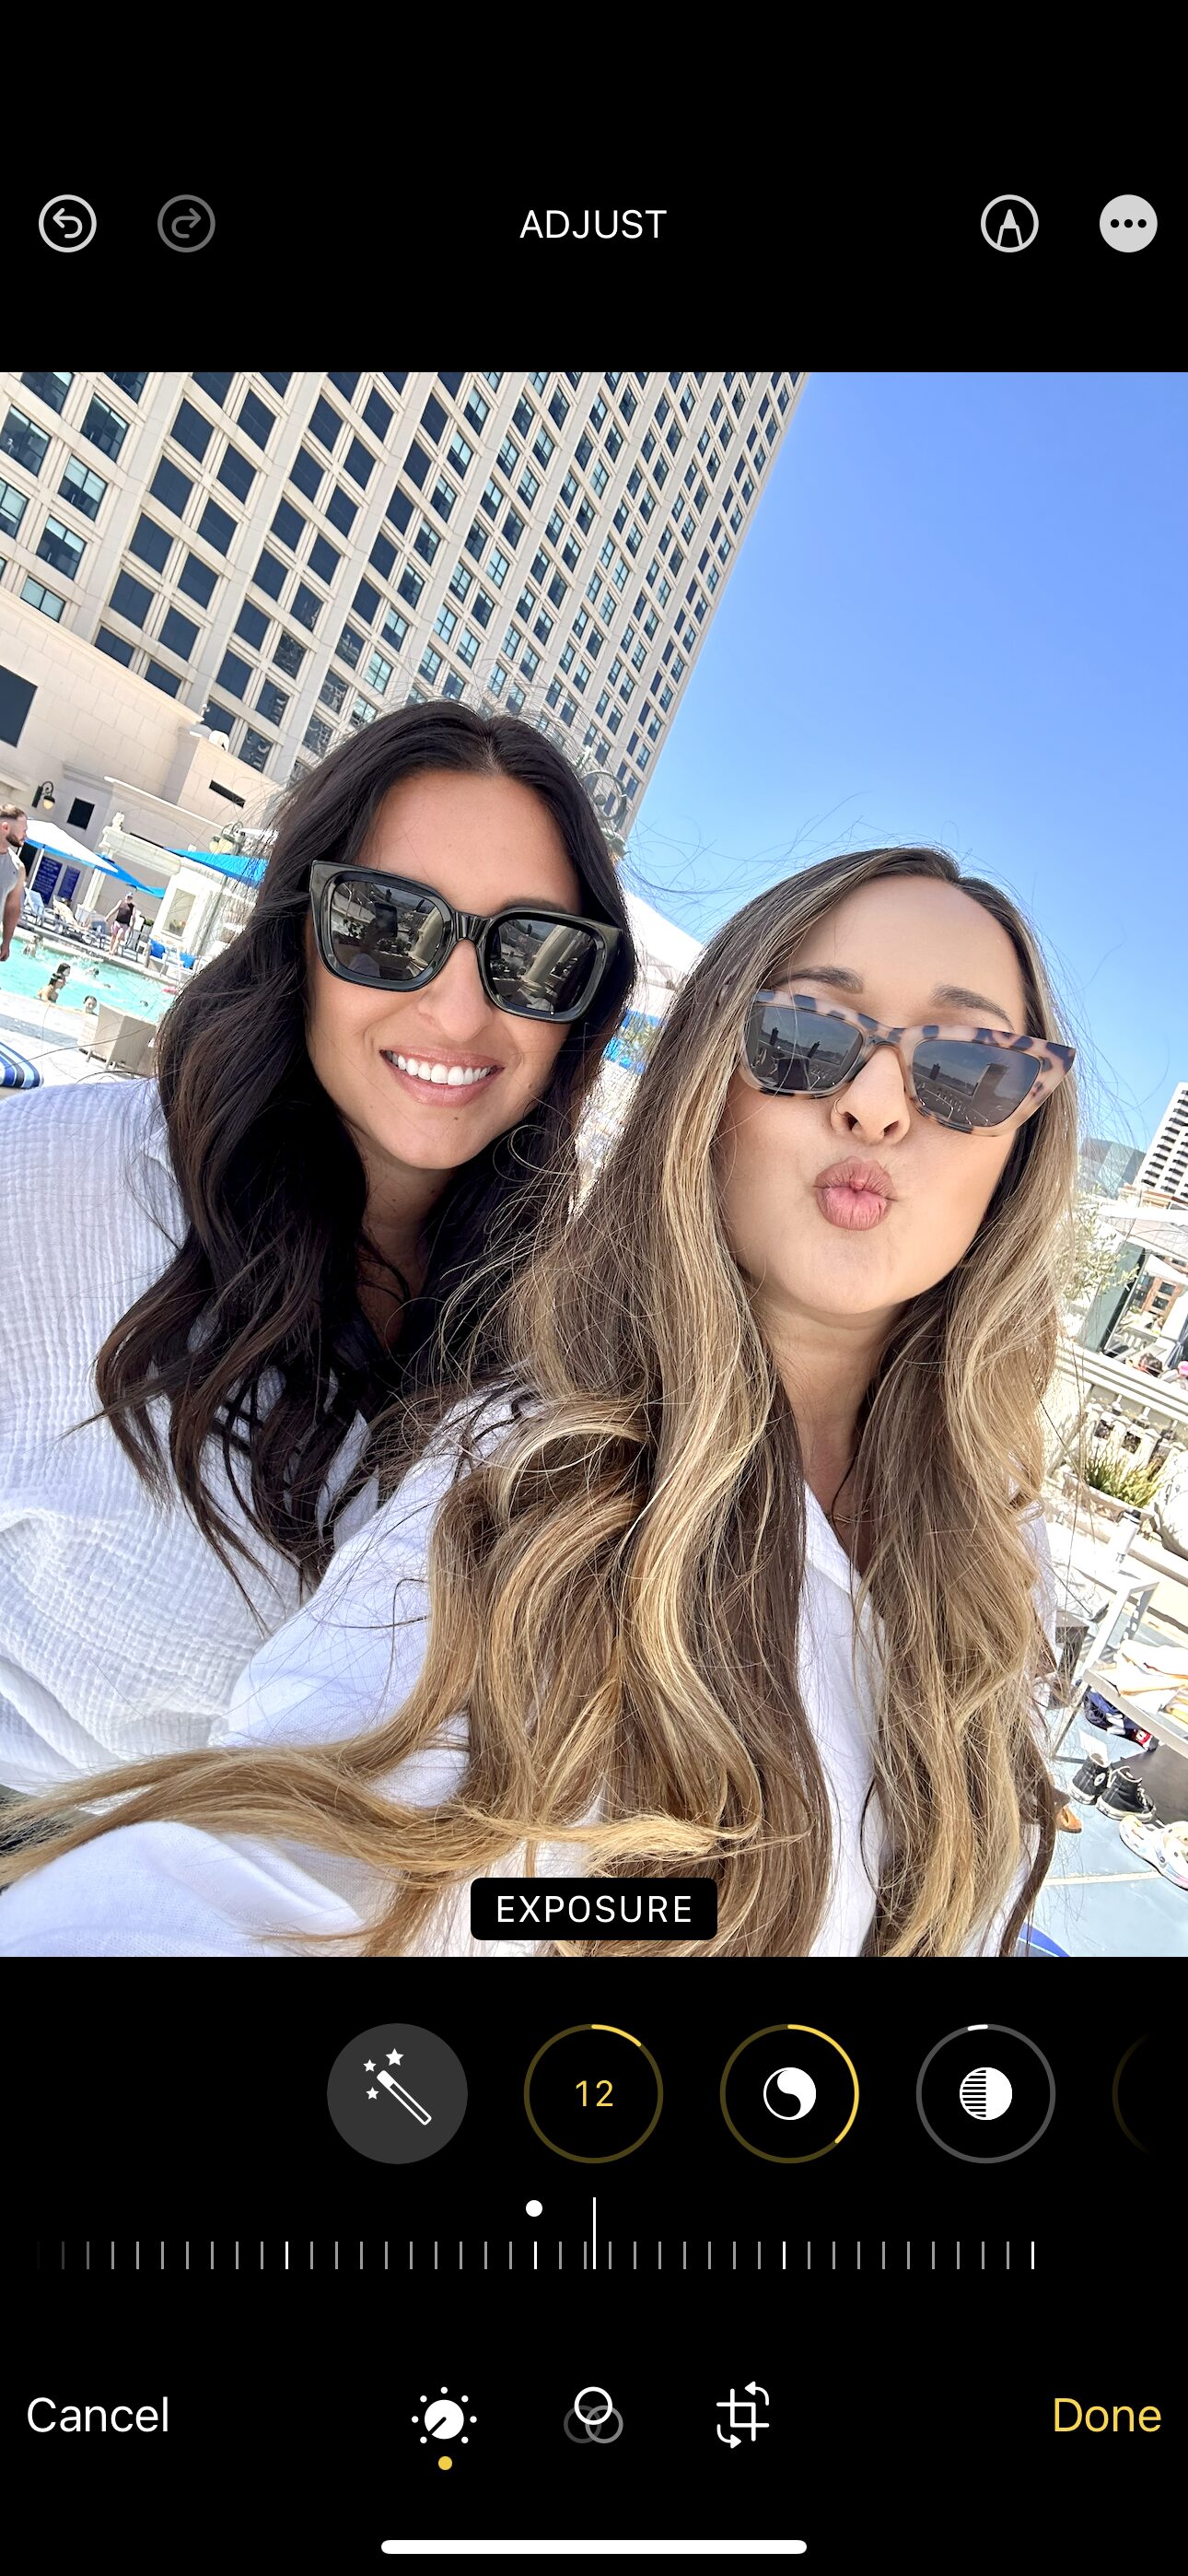
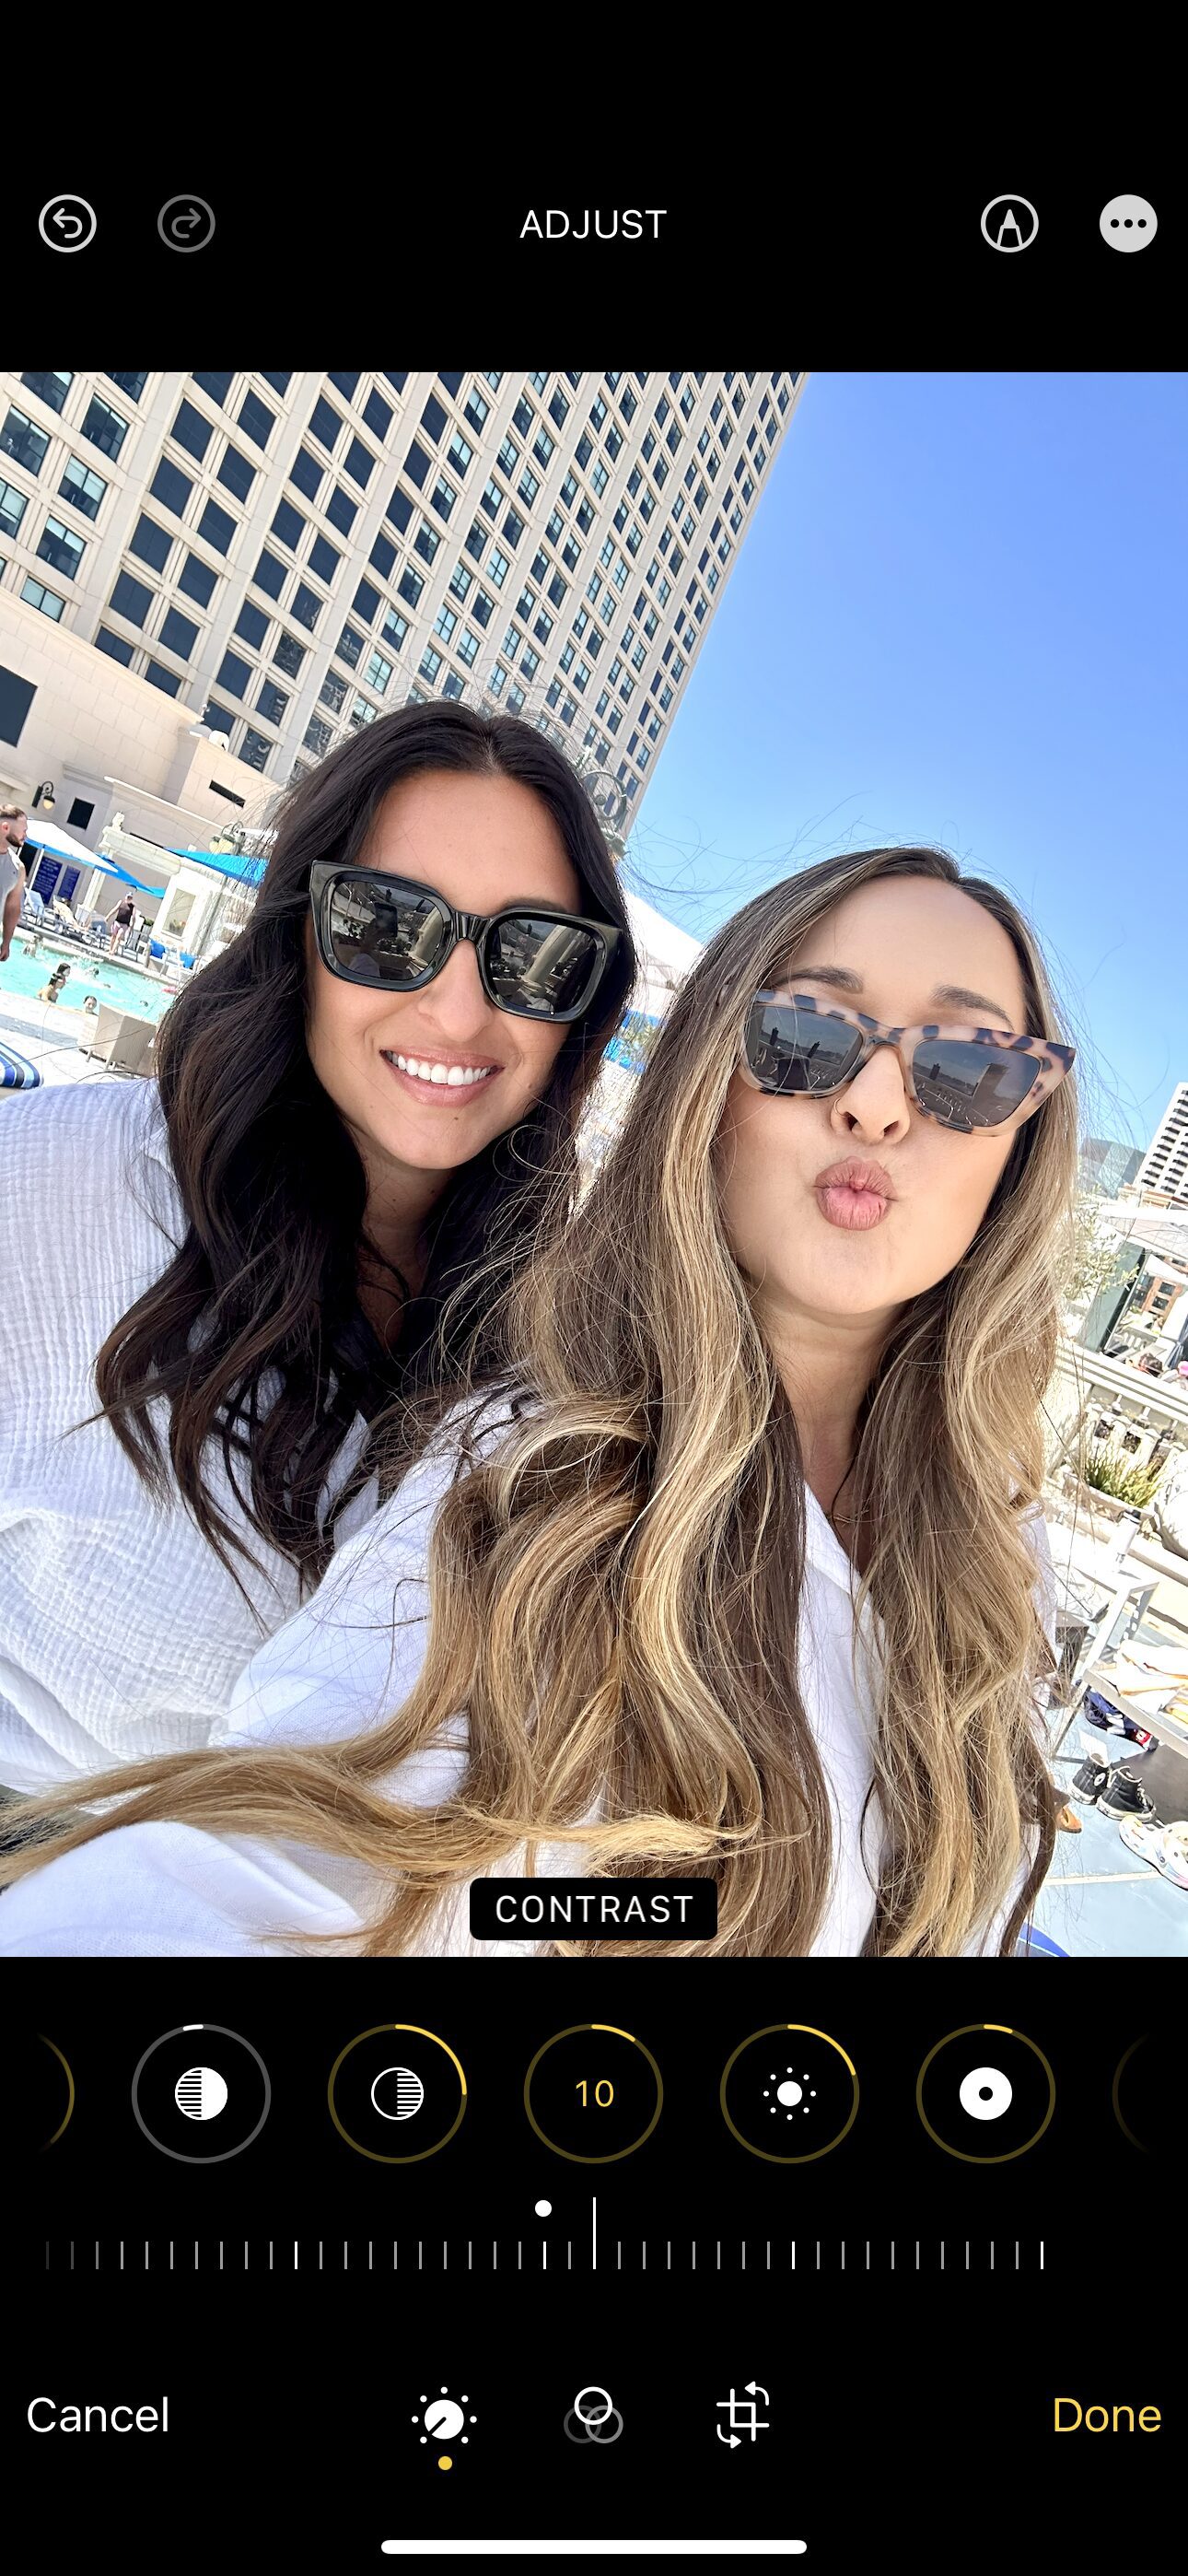
Exposure
It may seem like overkill to bring up the exposure of the image after the shadows, and the brightness, but like I said, I like my images on the bright side (get it?). I want to get these things right because while the “auto edit” has done much of the other editing just fine, the brightness of the image is my personal preference and thus, needs to be adjusted.
Contrast
Next I add just a little bit of contrast. This helps my subject stand out just a little more, and gives a some kind of definition. I don’t want too much, I just don’t want things to looking flat.
Honorable Mention: Highlights
Usually when I bring up my exposure, there will be some spots in my image that look extra bright — almost white. Because I’m using the “auto” button, that didn’t happen this time. However, if it does happen and I want to temper those really bright spots, I’ll bring my highlights down so that things look bright without being blinding white.
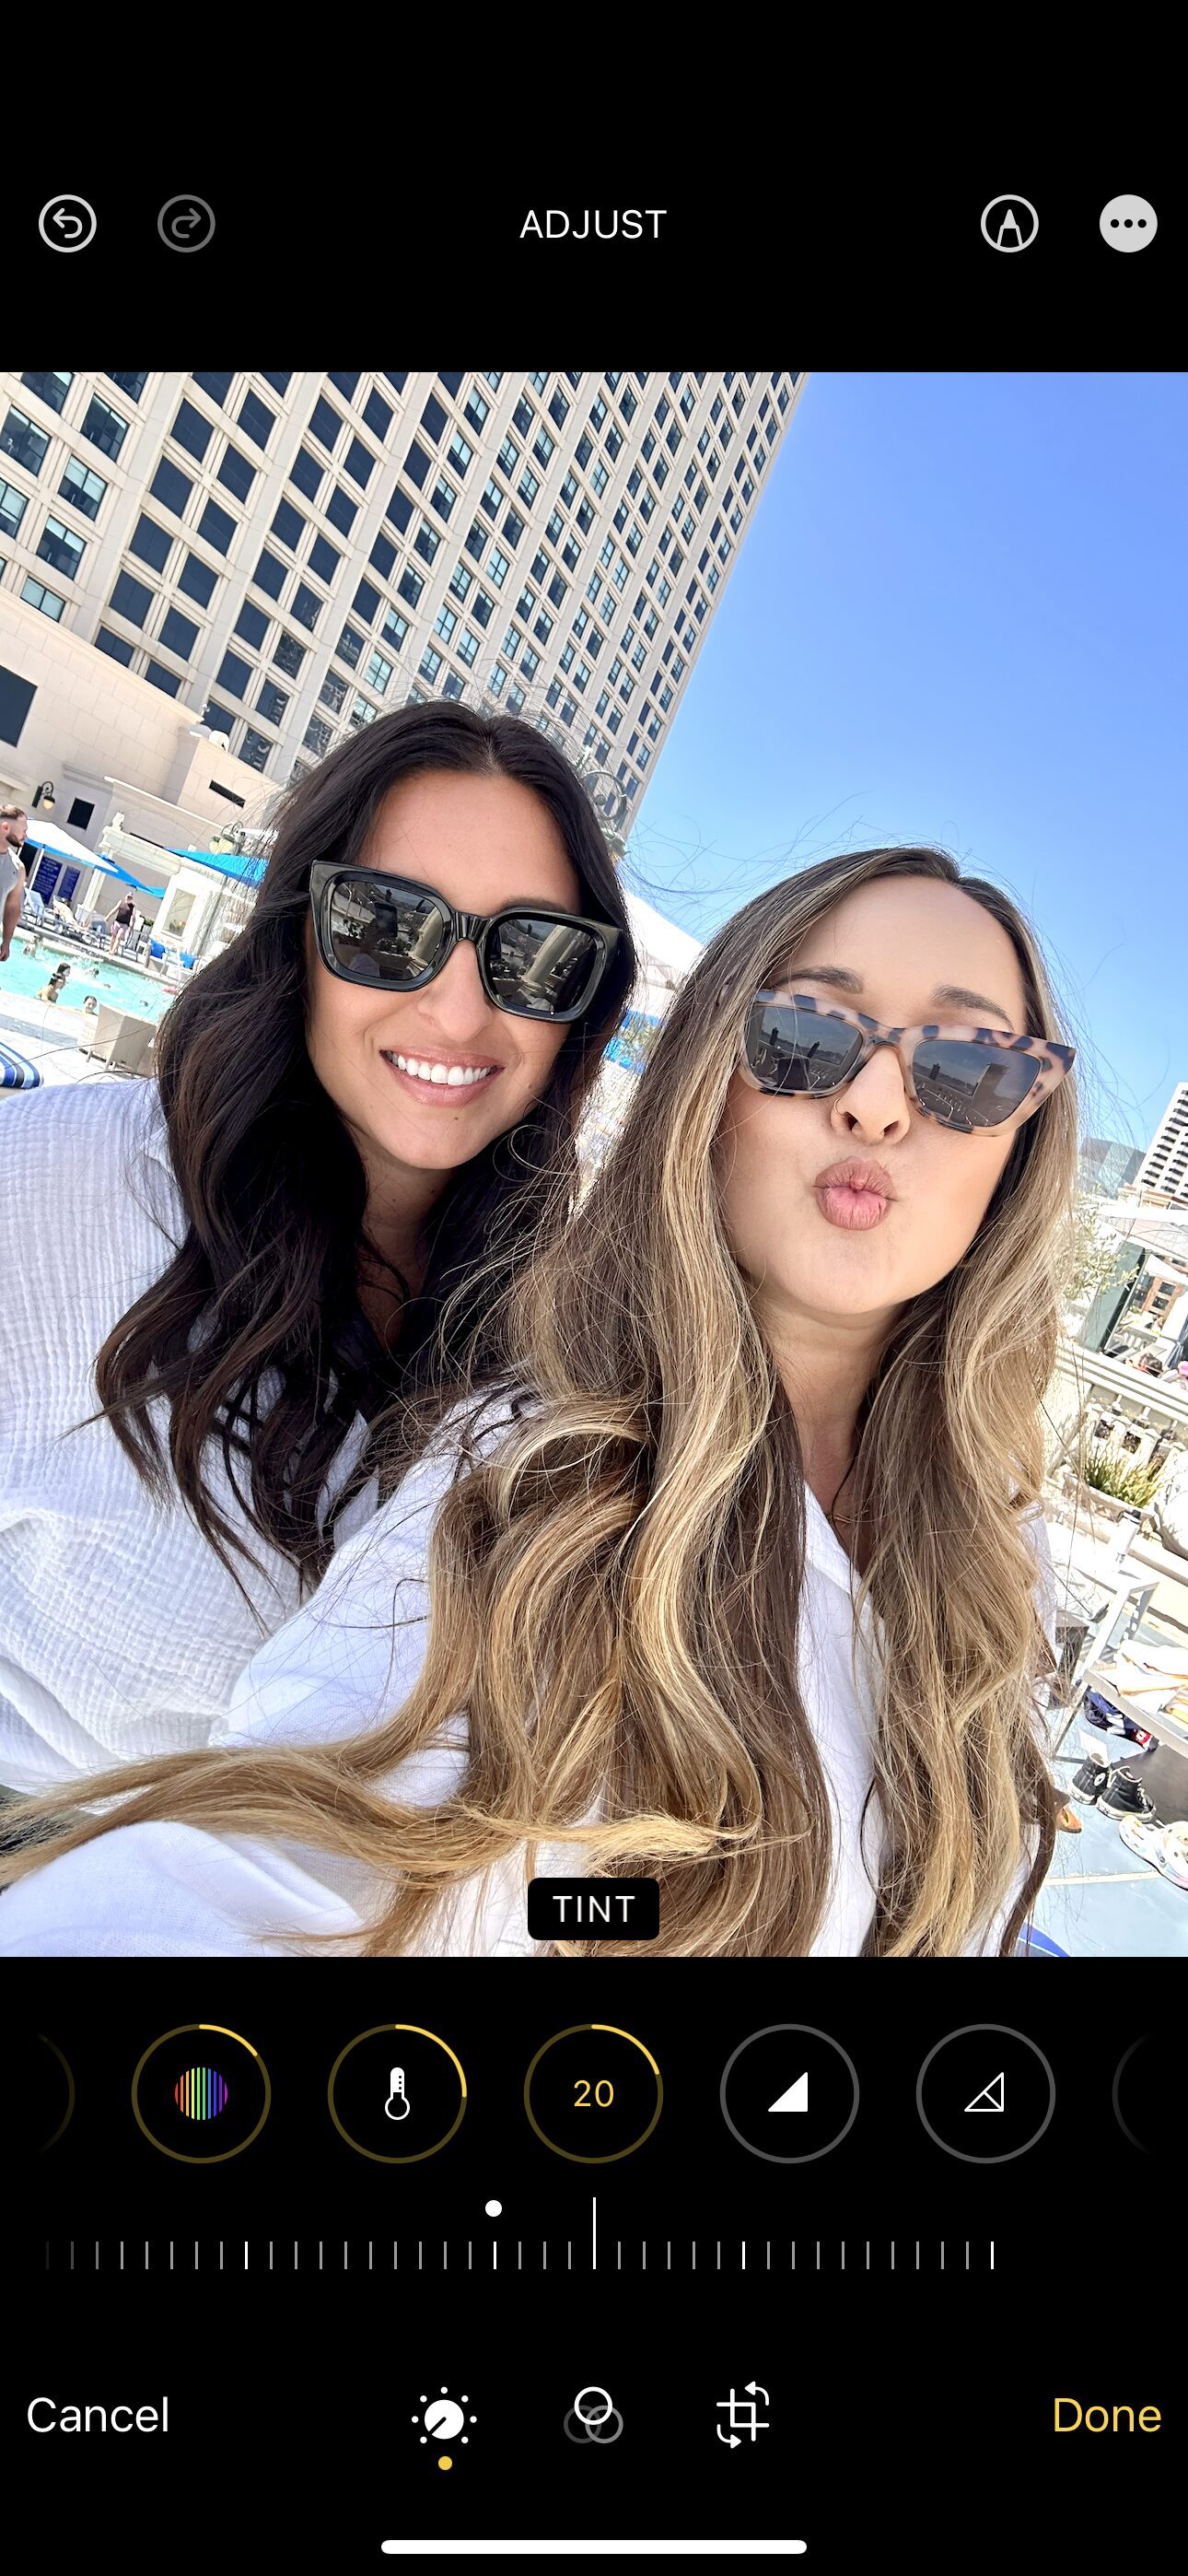
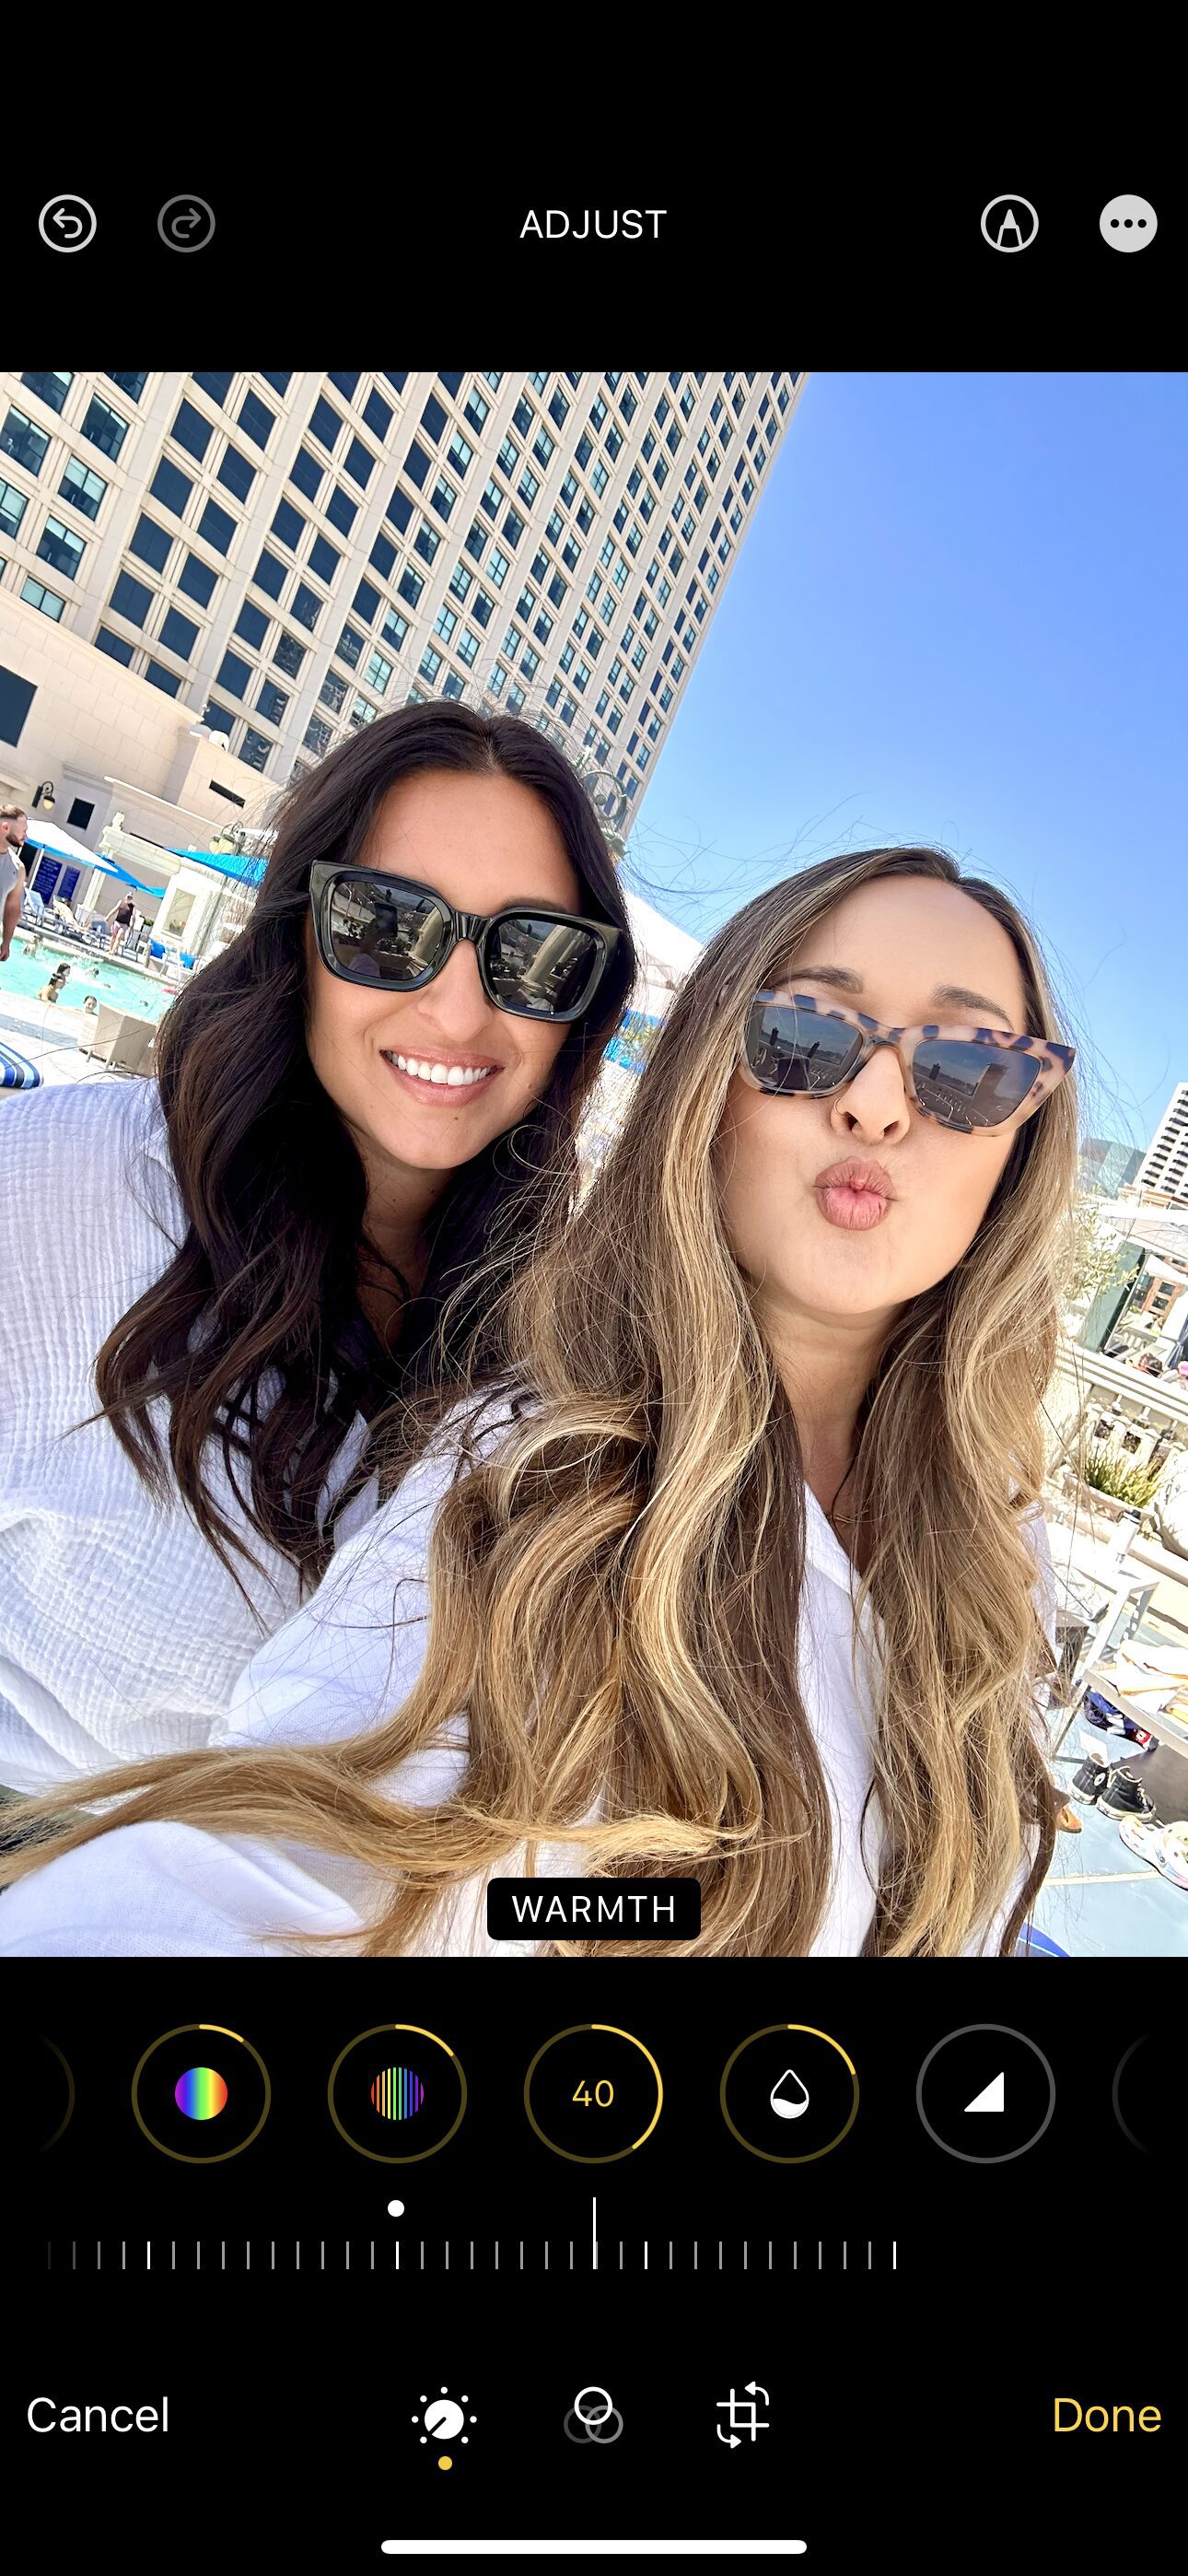
Tint
I find that using “auto” buttons tends to make my photos on the cooler end of the spectrum, and makes skin tones a bit sallow, so I want to be sure to bring the life back into skin tones and make them a bit more pink. Skin should look healthy and glowing, not too green and not too pink.
Warmth
I like my photos on the warmer end of the spectrum so I’ll adjust it slightly for all my images. In my opinion, warmth really adds to the overall feel you get when you look at an image, and I want my viewer to feel warm and bright when they look at my images.
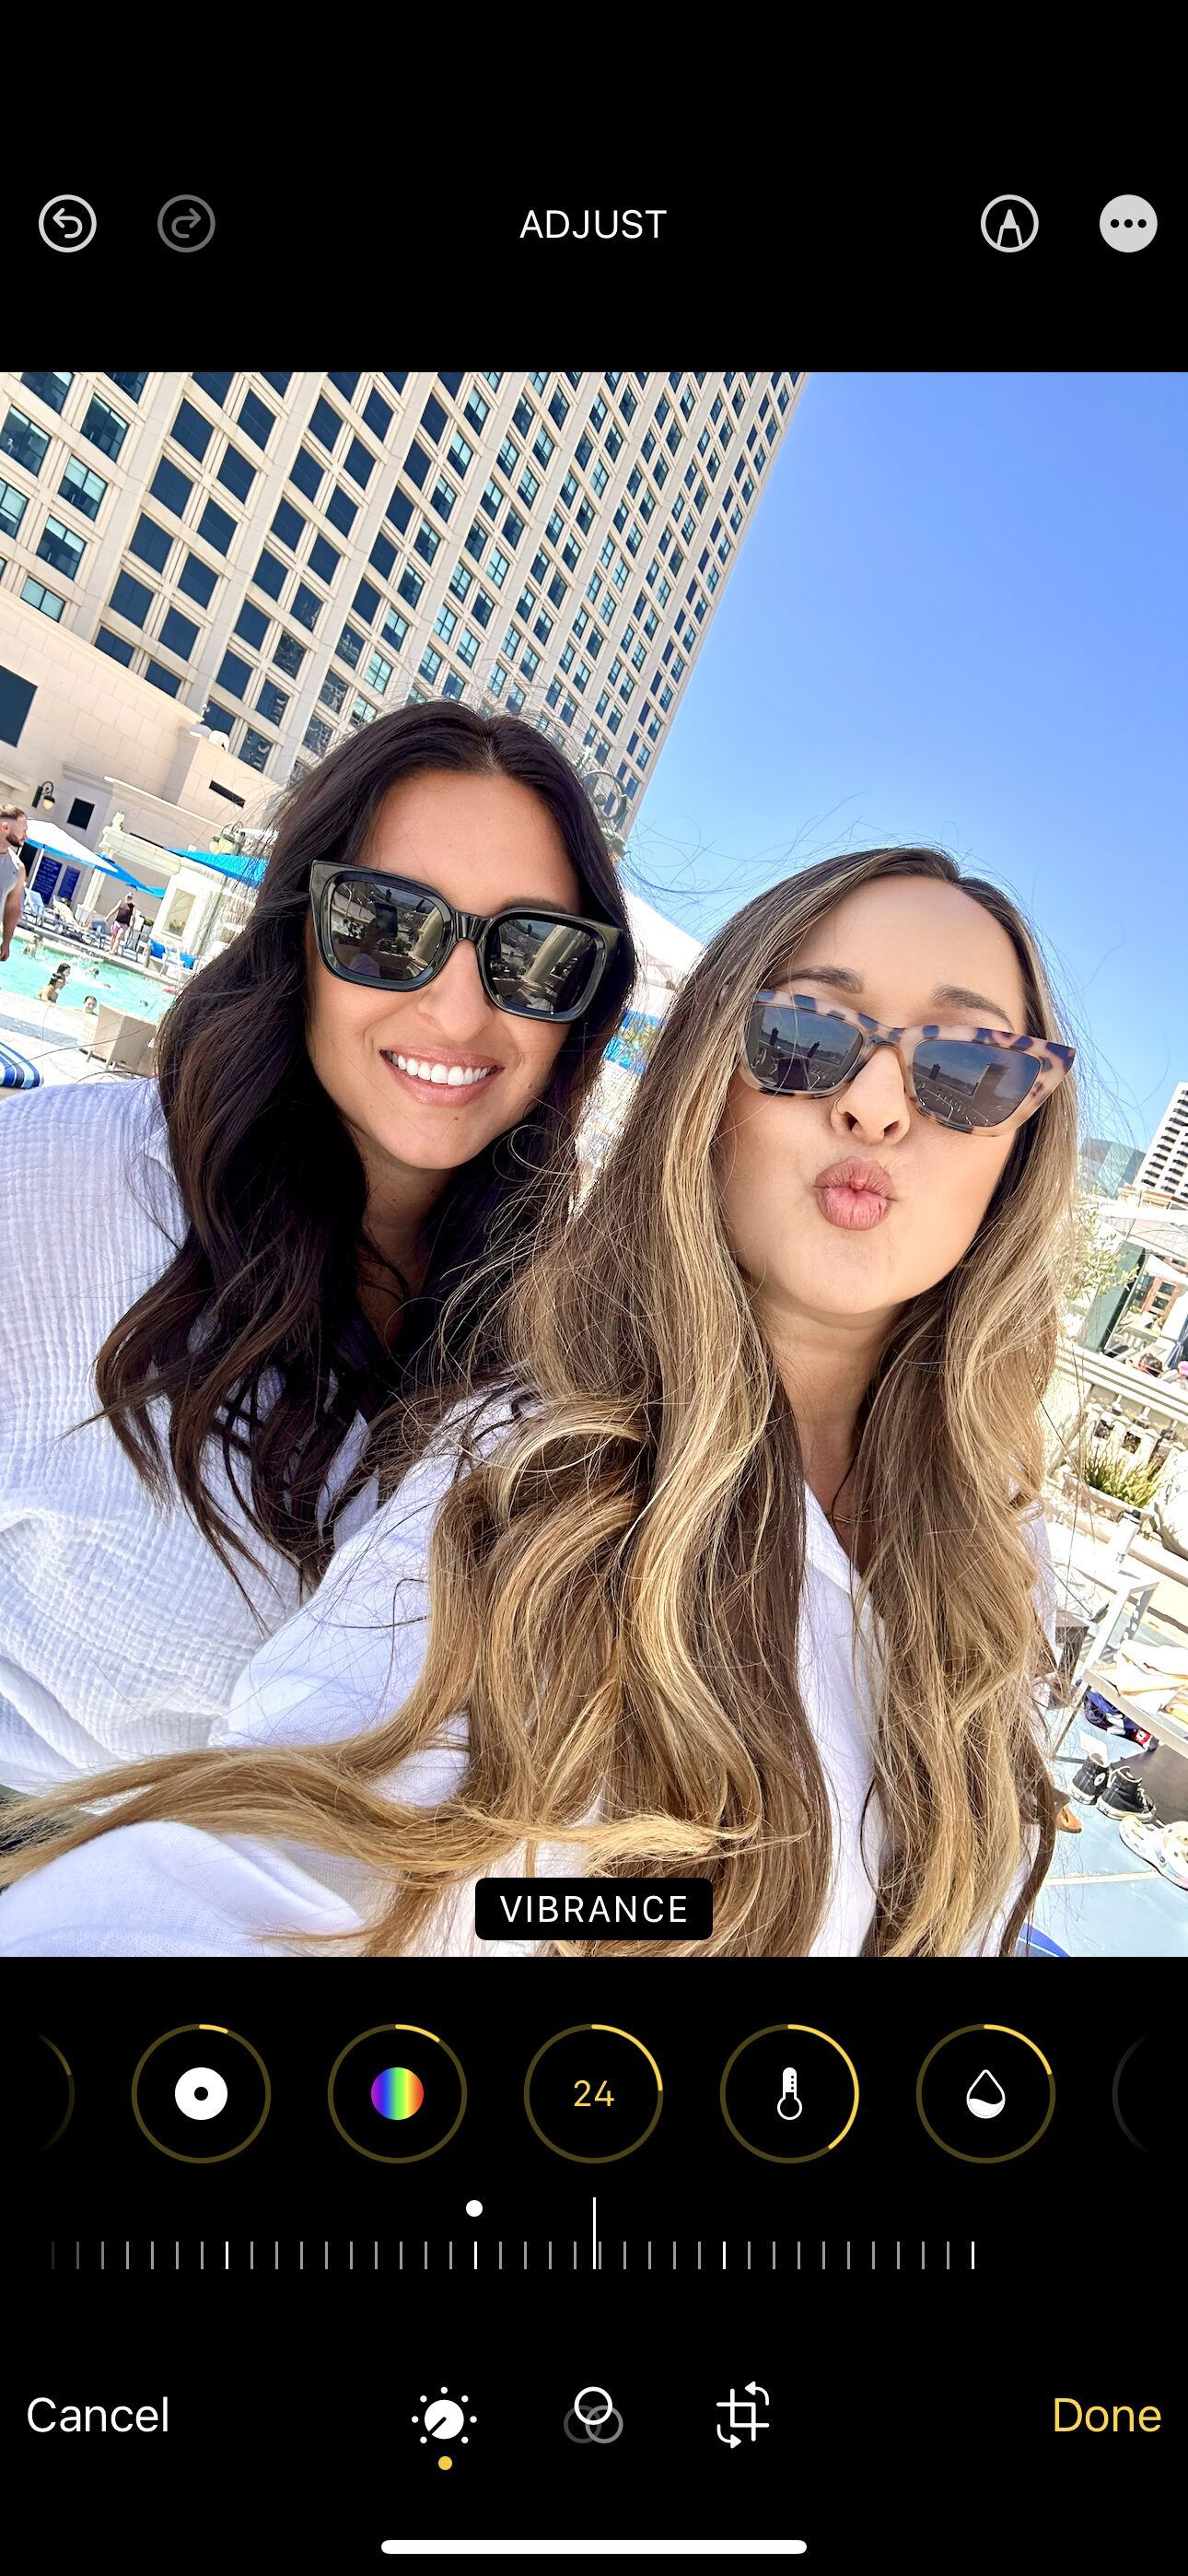
Vibrance
Lastly, if my photo looks a little too drab, I will adjust the vibrance to add a little more oomph. That really just brings colors a little more energy.


Et Voila!
Do you see how there’s not that much of a difference between the “before” image and the “after?” For the most part, the after image really just looks like a more vibrant version of the first. It looks polished, without looking too edited. And we’ve done it! Using only my iPhone I now have a picture of me and my sister that looks and feels “finished.”
I’ll tell you, I don’t normally edit in the Photos app on my iPhone. So, when I began writing this post, I started editing this image the way I normally do in Lightroom, but it wasn’t really coming out the way I wanted it to. I was surprised when I clicked “auto” that it had done much of the foundational editing work for me and needed only slight adjustments. I thought that might be easier for you to replicate and so, this is how I decided to edit my iPhone image using only what Apple had to offer in my Camera Roll app.
If I wanted to achieve a consistent look across all images, this is how I would approach editing each and every photo, no matter where it was taken. When you edit the same, you get a consistent look that feels like it’s telling the same story — your story. It is worth your while to find a style that you like and stick to it. When you look back on the memories you have stored your iPhone, I hope it feels like the story of you.
And that’s a wrap, folks!
I hope throughout this 4-week journey, you’re learned a lot about taking better photos using only your smartphone and I hope that you’re seeing the proof in the pudding! I hope you feel empowered to capture your own family memories and that you will use these tools to fill up your photo books and picture frames with images you love. I can’t wait to see all the beautiful photos you take of your loved ones all over your Instagrams and hopefully, framed in your living rooms and in the hallways of your houses. Feel free to drop a comment if you have questions or need further clarification, or if you just want to say that you found this helpful! I’m here for all of it, sis.
Until next time!
xo,
Jess
Meet Jess!
The Jesus followin', Free People wearin', chocolate chip cookie eatin' Diet Coke addict who loves her man, good fiction, and all things sparkly
Let's be friends!